SpringMVC系列或者是SpringBoot系列中都会有大量的案例,这些案例都需要运行来验证效果,所以急需一款高效的接口测试工具。
可能大家用的比较多的是swagger或者postman,这2个确实不错,不过今天今天给大家推荐一种更简单的接口测试工具。
这款工具就是idea中的自带的: HTTP Client ,这款工具特别好用,主要的优点:
1、若想测试一个接口,只需要几行代码
2、运行特别容易
3、方便切换各种环境
1、创建一个springboot项目
idea中创建一个springboot项目,来个controller,内容如下,模拟了5种常见的情况,基本上包含了我们开发中所有的场景
    @RestController
    public class IndexController {
        //get请求
        @RequestMapping("/get")
        public String get() {
            return "get";
        }

        //post请求,模拟表单提交
        @PostMapping("/post")
        public Map<String, String[]> post(HttpServletRequest request) {
            return request.getParameterMap();
        }

        //post请求json数据
        @PostMapping("/body")
        public List<Integer> body(@RequestBody List<Integer> list) {
            return list;
        }

        //put请求
        @PutMapping("/put")
        public String put() {
            return "put";
        }

        //模拟多文件上传,顺便带上表单数据
        @PostMapping("/upload")
        public Map<String, Object> upload(@RequestParam("file1") MultipartFile file1,
                                          @RequestParam("file2") MultipartFile file2,
                                          User user,
                                          HttpServletRequest request) {
            Map<String, Object> result = new HashMap<>();
            result.put("file1.size", file1.getSize());
            result.put("file1.name", file1.getName());
            result.put("file2.originalFilename", file1.getOriginalFilename());
            result.put("file2.size", file2.getSize());
            result.put("file2.name", file2.getName());
            result.put("file2.originalFilename", file2.getOriginalFilename());
            result.put("params", request.getParameterMap());
            result.put("user", user);
            return result;
        }

        static class User {
            private String userName;
            private int age;

            public String getUserName() {
                return userName;
            }

            public void setUserName(String userName) {
                this.userName = userName;
            }

            public int getAge() {
                return age;
            }

            public void setAge(int age) {
                this.age = age;
            }
        }
    }
项目结构如下图
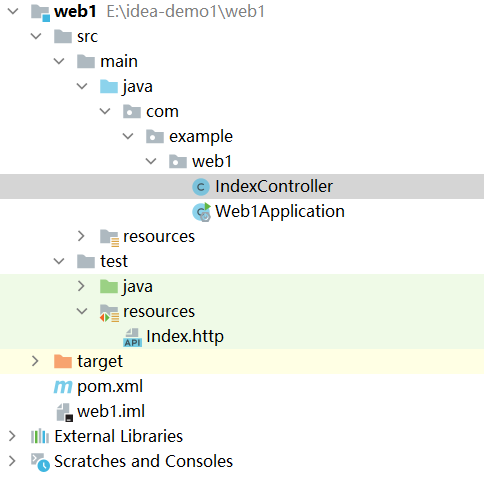
启动项目,下面我们来对这几个接口进行测试。
2、测试上面5个接口
下面我们通过HTTP Client工具来对上面几个接口进测试。
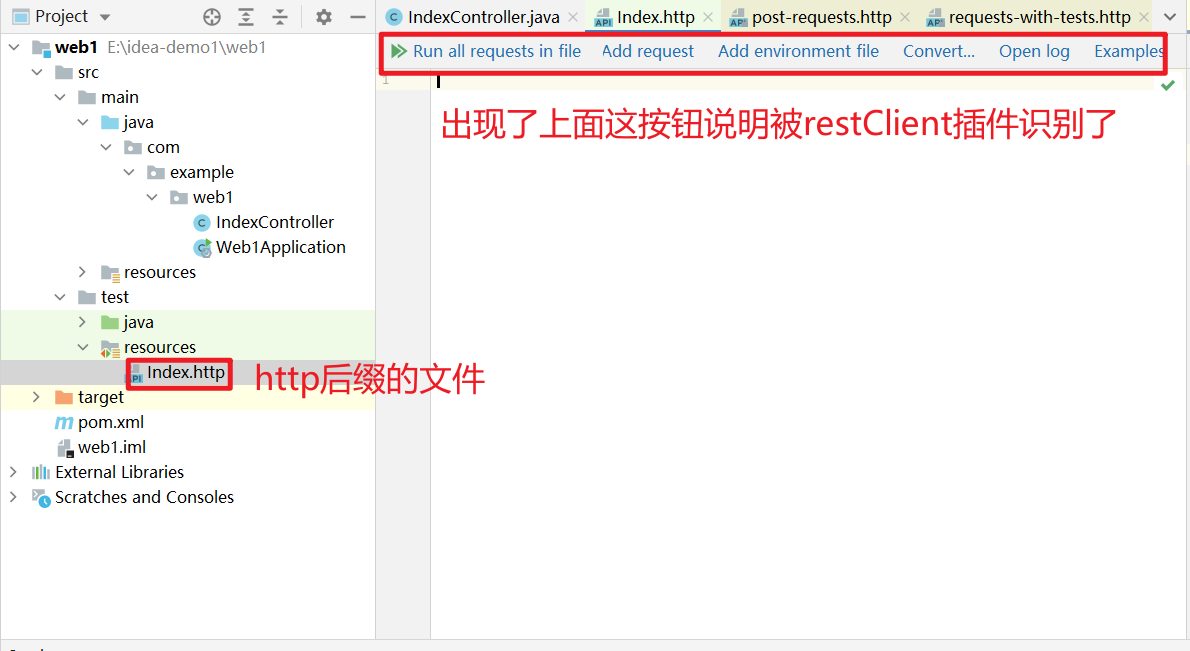
2.1、创建http后缀的文件
文件必须以http为后缀,这种文件会自动被 HTTP Client 插件识别,效果如下
2.2、将下面内容丢到创建好的文件中
    ### get 请求
    GET http://localhost:8080/get

    ### post 提交表单
    POST http://localhost:8080/post
    Content-Type: application/x-www-form-urlencoded

    name=张三&age=23

    ### body 中传递json数据
    POST http://localhost:8080/body
    Content-Type: application/json

    [3,10,40]

    ### put请求
    PUT http://localhost:8080/put


    ### 多文件上传文件接口测试
    POST http://localhost:8080/upload
    Content-Type: multipart/form-data; boundary=WebAppBoundary

    --WebAppBoundary
    Content-Disposition: form-data; name="file1"; filename="pic_1.jpeg"

    < C:\Users\Think\Desktop\1.jpeg
    --WebAppBoundary--

    --WebAppBoundary
    Content-Disposition: form-data; name="file2"; filename="pic_2.jpeg"

    < C:\Users\Think\Desktop\2.jpeg
    --WebAppBoundary--

    --WebAppBoundary--
    Content-Disposition: form-data;name=userName

    tom
    --WebAppBoundary--

    --WebAppBoundary--
    Content-Disposition: form-data;name=age

    23
    --WebAppBoundary--
    ###
接口格式很简单,如下
    请求方式 地址
    header部分,key=value格式,每个一行

    参数部分(注意这个上面要有个空行)
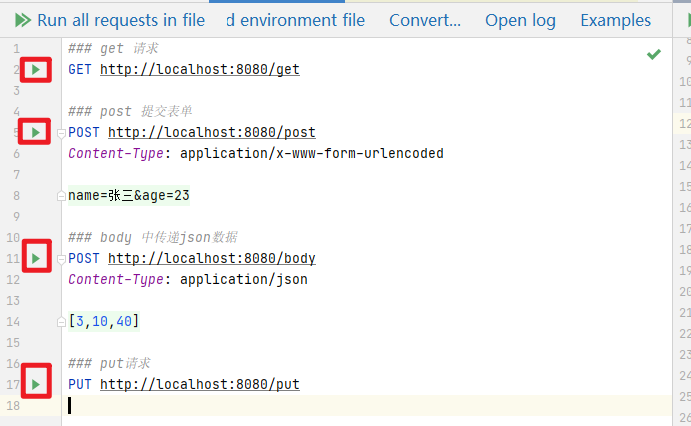
此时文件的效果是下面这样,点击红框中的按钮,即可以运行这个测试用例
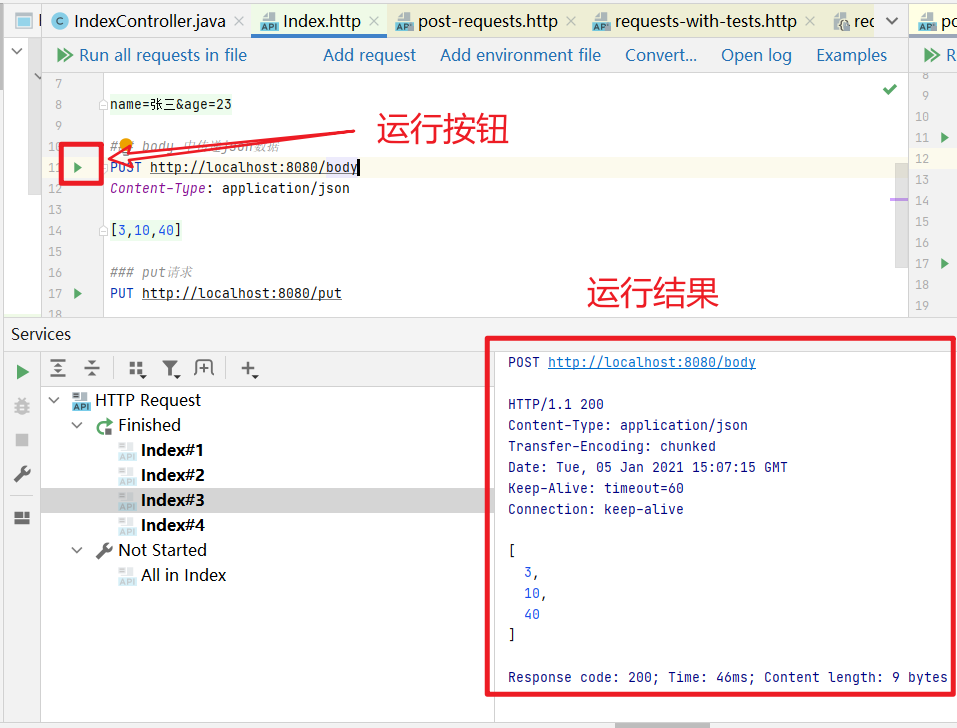
2.3、运行接口
3、http文件内容如何写?
HTTP Client 提供了很多案例,点击 Examples 案例可以看到各种请求案例,这里就不细说了,大家一看就懂。

4、文件上传的写法
多文件上传且携带表单数据,这个比较特别,下面是接口代码
    //模拟多文件上传,顺便带上表单数据
    @PostMapping("/upload")
    public Map<String, Object> upload(@RequestParam("file1") MultipartFile file1,
                                      @RequestParam("file2") MultipartFile file2,
                                      User user,
                                      HttpServletRequest request) {
    }
对应的 HTTP Client 的写法如下:
    ### 多文件上传文件接口测试
    POST http://localhost:8080/upload
    Content-Type: multipart/form-data; boundary=WebAppBoundary

    --WebAppBoundary
    Content-Disposition: form-data; name="file1"; filename="pic_1.jpeg"

    < C:\Users\Think\Desktop\1.jpeg
    --WebAppBoundary--

    --WebAppBoundary
    Content-Disposition: form-data; name="file2"; filename="pic_2.jpeg"

    < C:\Users\Think\Desktop\2.jpeg
    --WebAppBoundary--

    --WebAppBoundary--
    Content-Disposition: form-data;name=userName

    tom
    --WebAppBoundary--

    --WebAppBoundary--
    Content-Disposition: form-data;name=age

    23
    --WebAppBoundary--
    ###
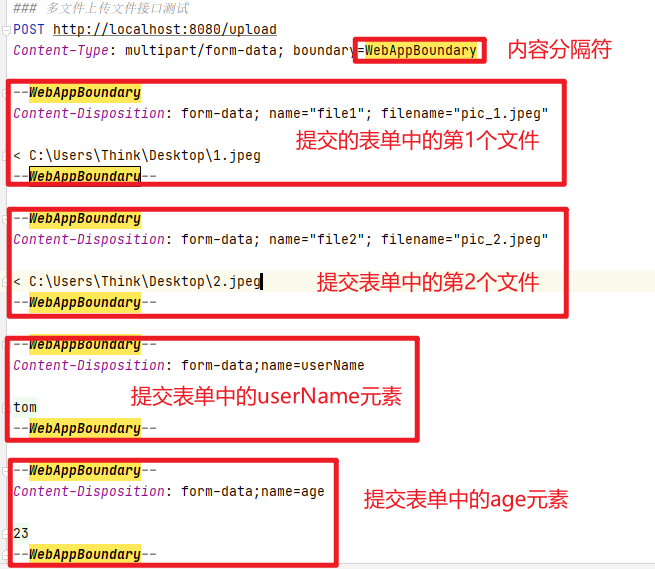
你可以把这个请求想象为页面中的一个表单,表单有4个元素:2个File元素,用来选择需要上传的2个文件,2个输入框,分别用来输入userName和age,用--WebAppBoundary来隔离每个元素,如果有多个元素,都需要用--WebAppBoundary隔离开来,如下:
5、环境切换
我们测试接口的时候,有开发环境、测试环境、UAT环境,生产环境,每个环境的接口信息都不一样,比如接口地址。
HTTP Client 中可以创建环境配置文件,来对不同的环境信息进行配置,操作如下
5.1、创建环境配置文件

生成了一个环境配置文件,如下
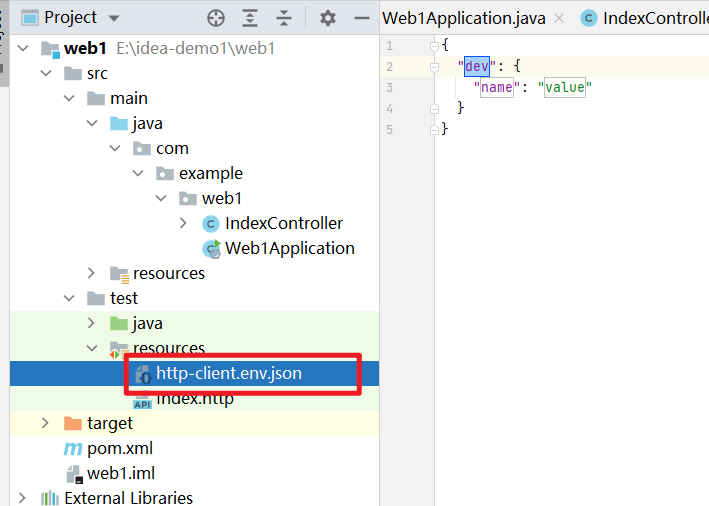
文件内容格式
    {
      "环境名称": {环境参数json格式},
      "环境名称": {环境参数json格式}
    }
如
    {
      "dev": {
        "url": "http://localhost:8080",
        "name": "张三"
      },
      "test": {
        "url": "http://localhost:9090",
        "name": "李四"
      }
    }
5.2、http文件中引用环境配置信息
通过{{key}}可以引用环境中的信息,运行的时候会被替换,如:
GET {{url}}/get
5.3、运行的时候选择环境
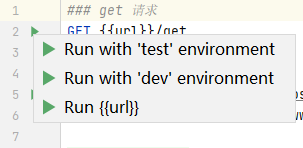
运行的时候会提示你选择环境,此时环境中的配置信息就被用上了
大家赶紧去体验一下。
Java 面试宝典是大明哥全力打造的 Java 精品面试题,它是一份靠谱、强大、详细、经典的 Java 后端面试宝典。它不仅仅只是一道道面试题,而是一套完整的 Java 知识体系,一套你 Java 知识点的扫盲贴。
它的内容包括:
- 大厂真题:Java 面试宝典里面的题目都是最近几年的高频的大厂面试真题。
- 原创内容:Java 面试宝典内容全部都是大明哥原创,内容全面且通俗易懂,回答部分可以直接作为面试回答内容。
- 持续更新:一次购买,永久有效。大明哥会持续更新 3+ 年,累计更新 1000+,宝典会不断迭代更新,保证最新、最全面。
- 覆盖全面:本宝典累计更新 1000+,从 Java 入门到 Java 架构的高频面试题,实现 360° 全覆盖。
- 不止面试:内容包含面试题解析、内容详解、知识扩展,它不仅仅只是一份面试题,更是一套完整的 Java 知识体系。
- 宝典详情:https://www.yuque.com/chenssy/sike-java/xvlo920axlp7sf4k
- 宝典总览:https://www.yuque.com/chenssy/sike-java/yogsehzntzgp4ly1
- 宝典进展:https://www.yuque.com/chenssy/sike-java/en9ned7loo47z5aw
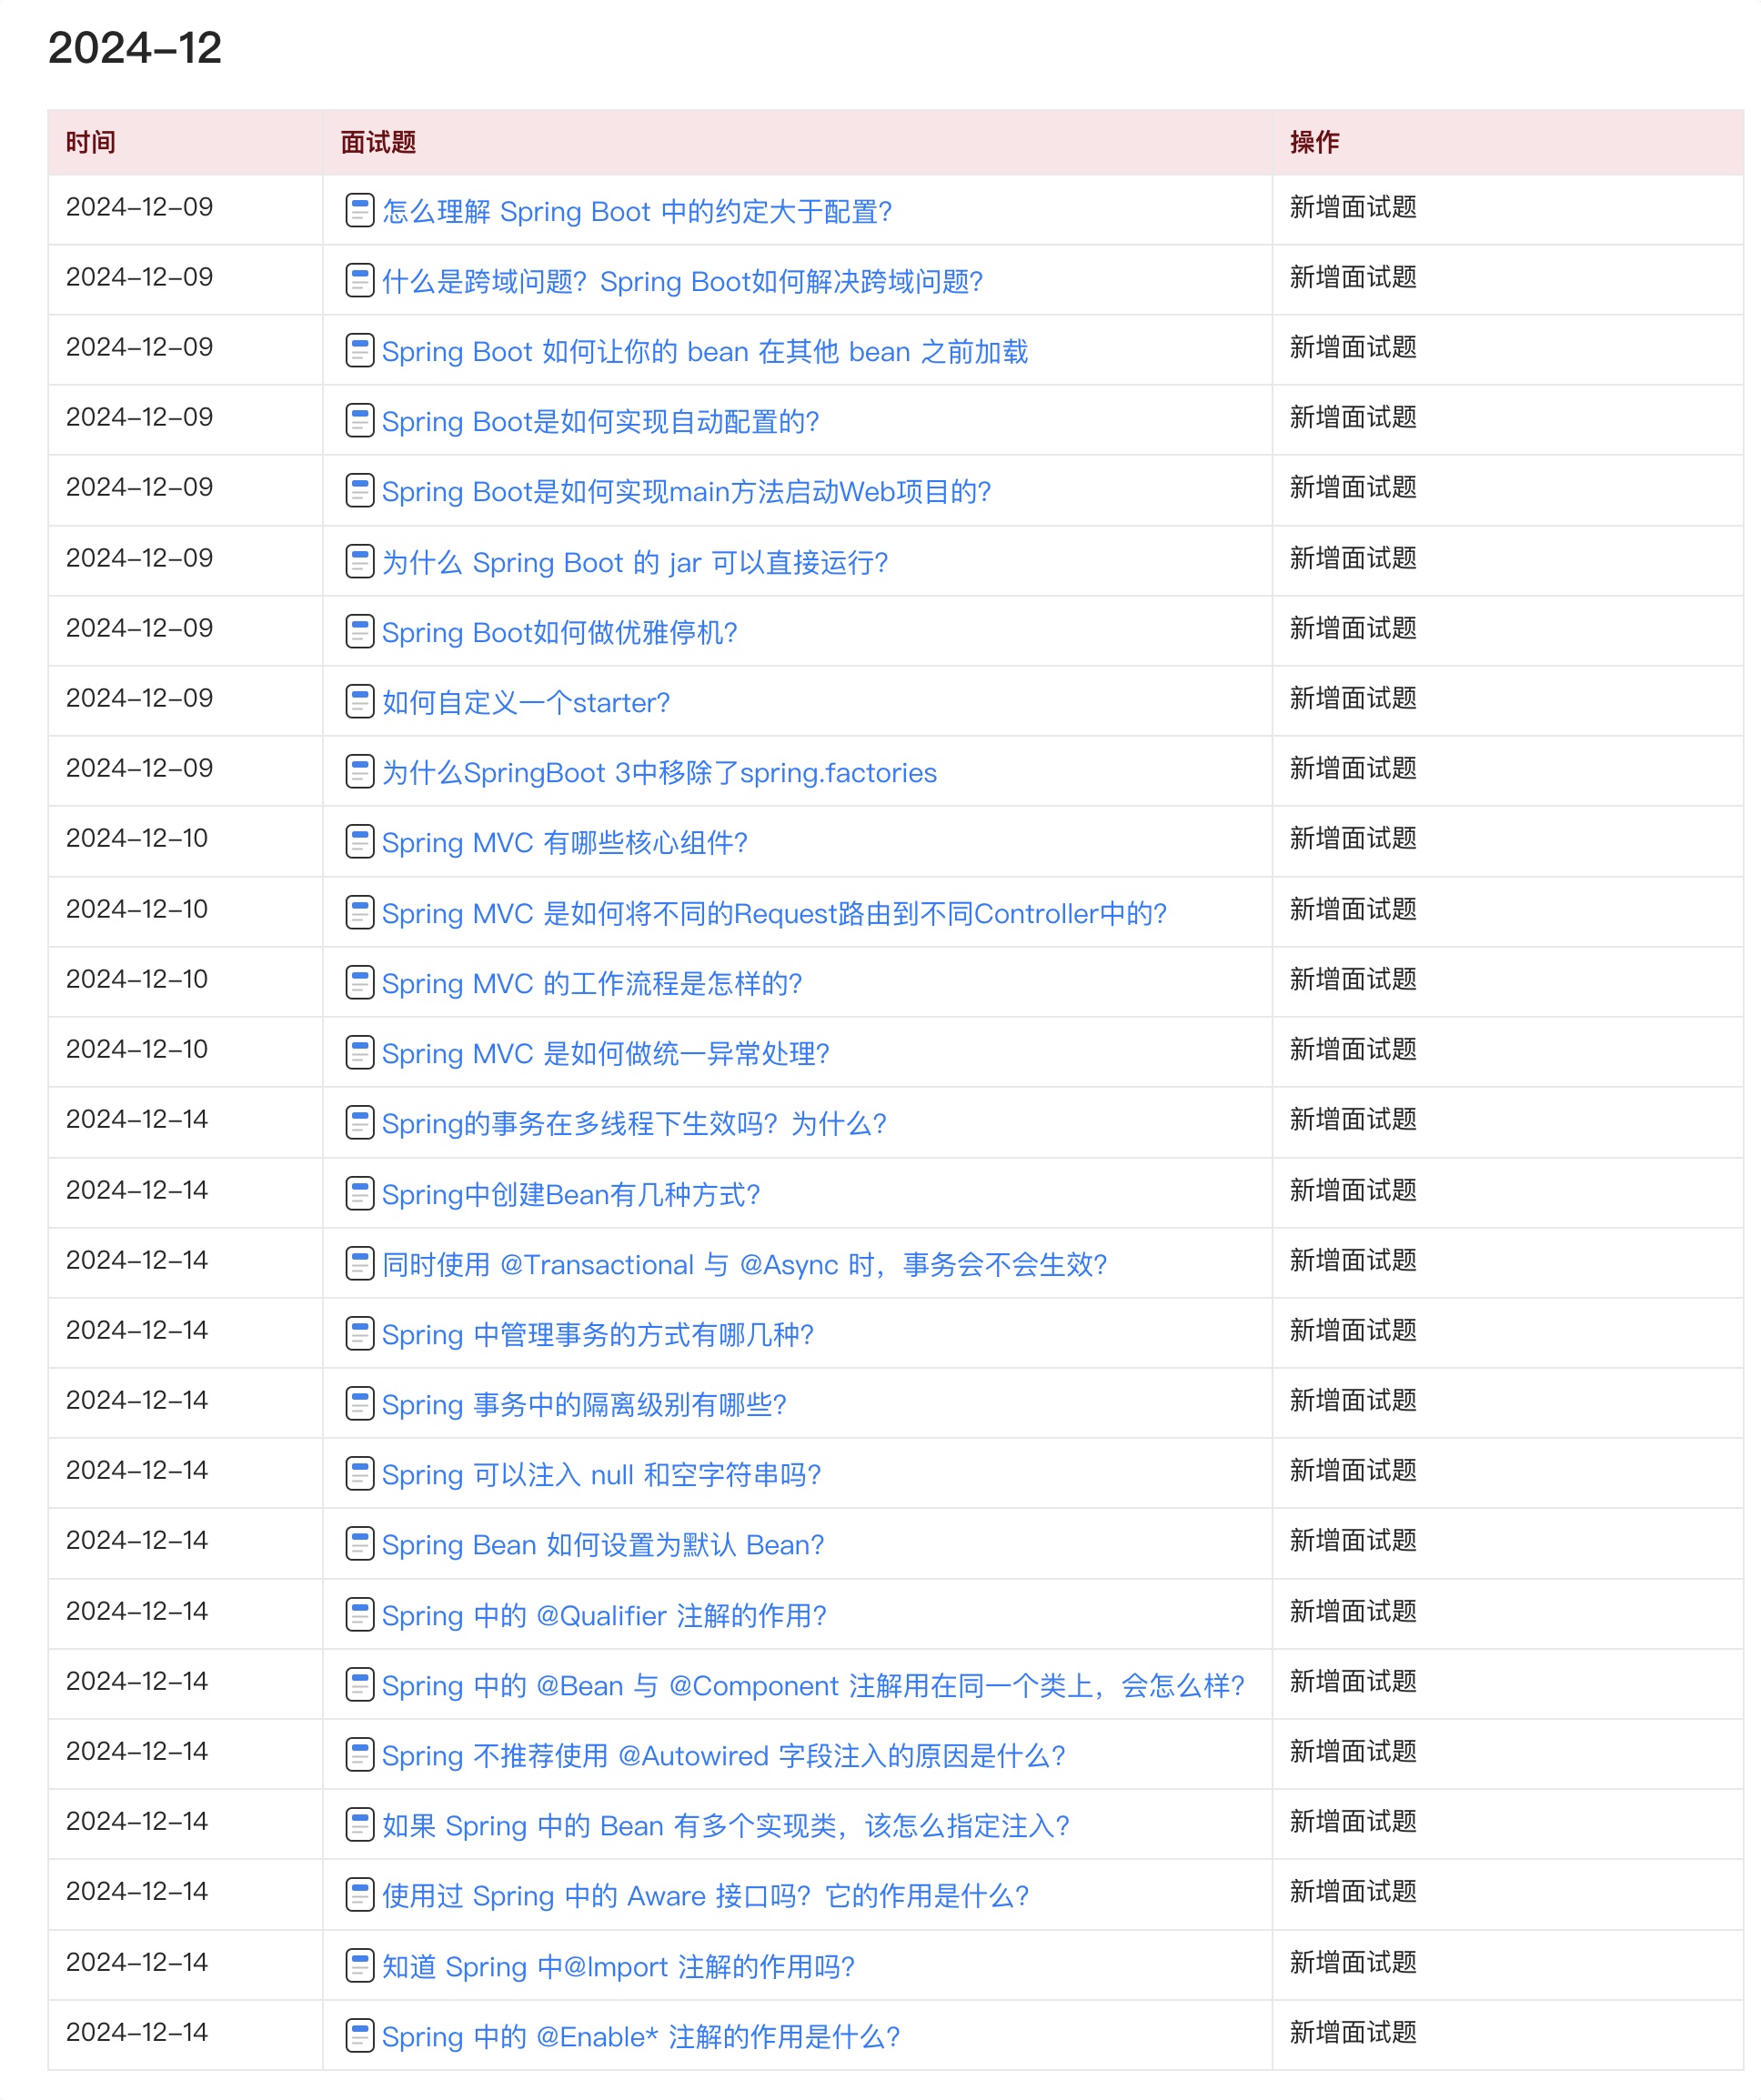
目前 Java 面试宝典累计更新 400+ 道,总字数 42w+。大明哥还在持续更新中,下图是大明哥在 2024-12 月份的更新情况:
想了解详情的小伙伴,扫描下面二维码加大明哥微信【daming091】咨询

同时,大明哥也整理一套目前市面最常见的热点面试题。微信搜[大明哥聊 Java]或扫描下方二维码关注大明哥的原创公众号[大明哥聊 Java] ,回复【面试题】 即可免费领取。
