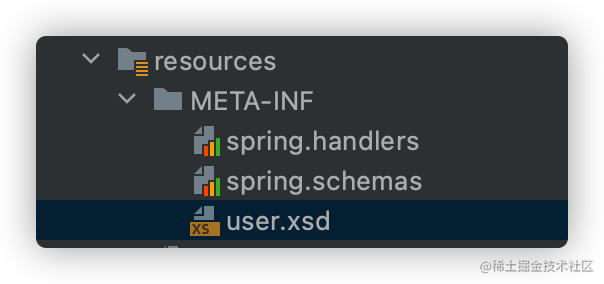
我们平时使用spring的时候,基本都是直接使用spring内置的标签,比如常用的<bean>,<aop:>,<tx:>标签,如果要自定义一个spring标签如何处理?
- 创建一个自定义解析处理类(在init方法中添加parser类)
- 创建一个普通的spring.handlers配置文件,让应用程序能够完成加载工作
- 创建对应标签的parser类
- 创建自定义解析处理类
    public class UserNamespaceHandler extends NamespaceHandlerSupport {
        @Override
        public void init() {
            registerBeanDefinitionParser("user",new UserBeanDefinitionParser());
        }
    }
- 创建 spring.handlers 配置文件,文件内容如下:
http://www.spring.com/schema/user=com.dabao.selftag.UserNamespaceHandler
- 创建对应标签的parser类
    public class UserBeanDefinitionParser extends AbstractSingleBeanDefinitionParser {

        // 返回属性值所对应的对象
        @Override
        protected Class<?> getBeanClass(Element element) {
            return User.class;
        }

        @Override
        protected void doParse(Element element, BeanDefinitionBuilder builder) {
            // 获取标签具体的属性值
           String userName = element.getAttribute("userName");
           String email = element.getAttribute("email");
           String password = element.getAttribute("password");

           if(StringUtils.hasText(userName)){
               builder.addPropertyValue("username",userName);
           }
           if (StringUtils.hasText(email)){
               builder.addPropertyValue("email",email);
           }
           if (StringUtils.hasText(password)){
               builder.addPropertyValue("password",password);
           }
        }
    }
- 定义标签对应的实体类
    public class User {

        private String username;
        private String email;
        private String password;

        public String getUsername() {
            return username;
        }

        public void setUsername(String username) {
            this.username = username;
        }

        public String getEmail() {
            return email;
        }

        public void setEmail(String email) {
            this.email = email;
        }

        public String getPassword() {
            return password;
        }

        public void setPassword(String password) {
            this.password = password;
        }
    }
- 同时需要定义好对应的schema和xsd文件 spring.schemas文件内容
http://www.spring.com/schema/user.xsd=META-INF/user.xsd
user.xsd文件内容:
    <?xml version="1.0" encoding="UTF-8"?>
    <schema xmlns="http://www.w3.org/2001/XMLSchema"
            targetNamespace="http://www.spring.com/schema/user"
            elementFormDefault="qualified">
        <element name="user">
            <complexType>
                <attribute name ="id" type = "string"/>
                <attribute name ="userName" type = "string"/>
                <attribute name ="email" type = "string"/>
                <attribute name ="password" type="string"/>
            </complexType>
        </element>
    </schema>

在xml中:
    <?xml version="1.0" encoding="UTF-8"?>
    <beans xmlns="http://www.springframework.org/schema/beans"
           xmlns:xsi="http://www.w3.org/2001/XMLSchema-instance"
           xmlns:aaa="http://www.spring.com/schema/user"
           xsi:schemaLocation="http://www.springframework.org/schema/beans http://www.springframework.org/schema/beans/spring-beans.xsd
           http://www.spring.com/schema/user http://www.spring.com/schema/user.xsd">
        <aaa:user id = "testbean" userName = "lee" email = "bbb"/>
    </beans>
跑一下:
    public class TestSelfTag {
        public static void main(String[] args) {
            ApplicationContext context = new MyClassPathXmlApplicationContext("selftag.xml");
            User user=(User)context.getBean("testbean");
            System.out.println("username:"+user.getUsername()+"  "+"email:"+user.getEmail());
        }
    }
结果: username:lee email:bbb
